

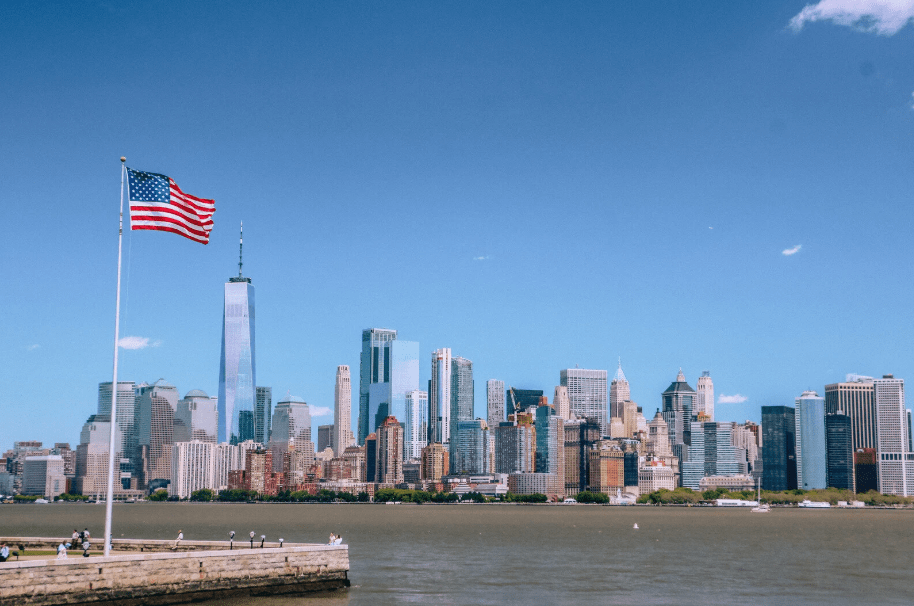
Everything they say about New York City is true. It’s loud, busy, and full of life. It really is the city that never sleeps. That can be pretty overwhelming—especially when planning your first New York trip itinerary. Figuring out what to do, what to see, and how to get around can be challenging.
I had passed through New York a couple of times as a kid. However, this was my first time planning my own New York trip itinerary. It was the perfect place for Taylor and I to “meet in the middle.” We could see each other for a week (my partner lived in Oregon).
We were fortunate enough to have friends to stay with in New York for the week. Unfortunately, you won’t find any accommodation recommendations in this guide. What you choose will depend very much on your own budget and duration of stay. There are plenty of options to choose from in New York.
If you have the option to stay in New York longer, the rest of the state has much to offer. I highly recommend planning a New York road trip. This will ensure you make the most of your time in the state! Alternatively, you could take a bus trip from New York City to Philadelphia. Experience another iconic US city on your trip!
Table of Contents
Table of Contents
Finding cheap flights to New York
Flying to New York used to always be considered an expensive trip, but it really isn’t anymore. With the introduction of budget international carriers like Norwegian Air, other major carriers are competing with low prices. British Airways and Virgin Atlantic now offer ‘Economy Light’ or ‘Economy Saver’ options. These options still give you the perks of long-haul travel. Meals and unlimited drinks are included. However, they do not include checked baggage. You can’t pick your seat until 24 hours before.
This option was honestly perfect for me. I travel light and I really didn’t need that much for a week in New York. So, traveling carry-on only was fine. Particularly as carry-on for large international flights allows a small carry size suitcase. It also allows a personal item which fits under the seat. I had a wheeling suitcase and a small day backpack with more than enough room.
My return flights cost £162 (Thursday to Thursday travel, with Virgin Atlantic, booked three months in advance).
For more tips, check out How to Find Cheap Flights.
Getting to and from the airport
Arriving at the airport often comes with the small challenge of reaching your accommodation while navigating an unfamiliar city. Depending on your group size and luggage, taking a cab might be both easier and more affordable. All New York yellow cabs use fixed meter fares. You don’t have to worry about being overcharged when departing from the airport. Simply proceed to the designated taxi stand outside the terminal.
We flew into JFK and took a cab upon arrival, then opted for the metro on our return trip. Both options were simple and convenient, especially after spending a week using the city’s metro system. In fact, the metro is often faster than a cab—I’ve never encountered such heavy traffic anywhere else!
How to get around the city
The New York public transit system is highly efficient and user-friendly. We stayed in Upper Manhattan. We mainly relied on the A and C (blue) metro lines. These lines helped us travel downtown and across to Brooklyn. However, there are multiple lines available, so be sure to check which one is nearest to your accommodation.
If you intend to use public transit, definitely get a METROCARD. I cannot recommend this small card enough! There are two types of MetroCard:
- Pay-per-ride
- Unlimited rides
If you’re visiting the city for just a few days, the Pay-Per-Ride MetroCard is likely your best option. This card is loaded with cash value. Each time you swipe to enter the subway, the fare is deducted from your balance. Each ride costs $2.75, no matter the distance or destination.
Benefits of Pay-per-ride
This card can be shared between up to 4 people. Just swipe through. Then pass it back to the next person to come through. This is great for couples or young families.
You can also use this card on other transport such as the buses.
You can use this card on the AirTrain to/from JFK.
If you’re visiting New York for more than a few days, consider the Unlimited MetroCard. This is especially beneficial if you plan to use the subway frequently. There are two options. One option is a 7-day unlimited rides card for $33 plus a $1 non-refundable card fee. The other option is a 30-day unlimited rides card for $127 plus the $1 card fee. We purchased the 7-day card and found it excellent value, taking the subway at least four times daily. We were staying in Upper Manhattan. Each round trip was at least 30 minutes. This made the unlimited rides a great deal.
Benefits of Unlimited
Unlimited travel on metro and buses, only pay the initial $34 fee.
The card is not activated until the first time you swipe in. If you buy it, you don’t have to use it immediately. You still have your 7 days of travel. Alternatively, you may have 30 days of travel.
If you travel 12 or more times in the time period, then you should buy the unlimited card. It is better than the pay-per-ride option.
BUT
You cannot share an unlimited card—there is an 18-minute time limit between turnstile swipes. We discovered this when Taylor swiped and then tried to go the wrong way through the turnstile. We had to wait 18 minutes before he could swipe again or ask the manned booth for assistance.
Unlimited tickets are not valid on the AirTrain. You will need a separate ticket, which costs $5.
You can buy Metrocards at automated machines in most stations or at manned booths. Note that some machines accept only cards and may ask for a ZIP code. If you’re from outside the USA, simply enter 00000.
You can find all this information and more in How to Get Around New York City.
New York City Pass
If it’s your first time visiting New York, you will want to see all the major attractions. I highly recommend getting a City Pass. There are many companies offering different packages, deals, and combinations, so it really depends on what interests you most. Some passes even include discounts on Broadway shows and helicopter tours.
Here’s the pass we chose. After comparing three options, we decided the key attractions we wanted included were:
- Empire State Building
- Top of the Rock
- 9/11 Memorial Museum
- Statue of Liberty & Ellis Island
- The American Museum of Natural History
- The Metropolitan Museum of Art
This pass covered all six. Some passes offer choices between attractions—for example, you could pick either Top of the Rock or the Guggenheim Museum. The options suited us perfectly. Having the pass often lets you skip the ticket lines. You can go straight to the entrance.
If your schedule is tight, keep in mind that some attractions require advance booking. Specific time slots are needed for places such as the Top of the Rock or Empire State Building.
We purchased these tickets during a sale on the City Pass website for £100, so it’s definitely worth shopping around. Just search “New York City Pass” on Google to compare options.
You can read my full New York Pass comparison here.

New York trip itinerary: 6-days
We divided the city into six key areas. They are organized roughly by neighborhoods. We planned to explore specific sections each day. This plan is around other activities we’ve booked—like visiting the Empire State Building or Top of the Rock. We also set aside some free time daily to meet friends or adjust our plans if needed.
The guide below outlines the main areas covered each day. It includes the specific locations and attractions we visited. You will also find useful tips. For photographers and Instagram enthusiasts, I’ve included photo location recommendations, based on extensive research.
If you’d like, you can download the spreadsheet with all neighborhoods and locations here. Make sure to enable offline viewing on Google Drive. This way, you can access it without data or Wi-Fi during your trip.
Day 1
Area: Downtown/ Lower Manhattan/ Staten Island
Sites covered:
- 9/11 memorial museum
- One World Trade Center
- The Oculus
- Federal Hall
- Charging Bull Statue
- Delmonico’s
- Stone Street District
- Staten Island Ferry
- Staten Island
Tips
- We took the E metro line (blue) downtown and got off at the World Trade Center stop. From here, the 9/11 Memorial, Oculus, and One World Trade Center—the 7th tallest building in the world—are all right there.
- Book your admission for the One World Observatory here.
- The 9/11 Memorial Museum was included in our City Pass, which we purchased in advance. This allowed us to skip the lines and enter directly. Keep in mind, you’ll need to pass through security checks. Outside food or drinks aren’t allowed (I had to quickly finish my banana). Alternatively, you can book a skip-the-line ticket here.
- There are also excellent combination tours available. For instance, there is the 9/11 Memorial tour that includes the Oculus. Another option is a full-day NYC tour featuring the Statue of Liberty, Empire State Building, and Federal Hall.
- We would have loved to return to the Stone Street District in the evenings when it’s livelier. Stone Street is New York’s oldest street, with charming cobblestones and a unique curved layout (a refreshing change from the typical straight US blocks!). The area boasts numerous bars and restaurants with street seating, creating a vibrant and fun atmosphere.
- From Stone Street, walk straight to the waterfront where you can watch helicopters taking off—we even spotted some military aircraft.
- Head right along the waterfront to reach the Staten Island Ferry terminal. Be prepared for many ticket sellers approaching you. Just ignore them or tell them you’re boarding the Staten Island Ferry. It is completely FREE.
- Yes, you read that right! If you want to save on pricey sightseeing cruises, the Staten Island Ferry is free, subsidized by the city. Simply go upstairs at the terminal and wait for the next boat, which arrives roughly every 30 minutes. Since crowds gather quickly, head straight to the stairs at the back of the boat (the boarding end). This spot offers stunning views of the Manhattan skyline as you depart. You’ll also see the Statue of Liberty on the right side of the boat, so have your camera ready.
- We mainly visited Staten Island for the boat ride. If you want to explore, we recommend The Flagship Brewing Company. This is a fantastic family-run brewery just a 10-minute walk from the ferry terminal.
Prefer an organised tour to see the main sights?
- Explore this self-guided tour of Wall Street
- Staten Island Ferry and Statue of Liberty Tour
- Statue of Liberty self-guided tour
Photography tips and prime locations
- The Oculus is more than just a shopping center—you can enter for free. Go to one of the balconies at either end of the main hall. Capture the iconic shot of its ship-like interior.
- Federal Hall is a must-see. Standing on its steps offers a perfect vantage point for capturing Pine Street straight ahead.
- Delmonico’s is a renowned New York steakhouse, located in a stunning red brick, wedge-shaped building in the Stone Street area. Though it was under renovation during my visit, its architecture is truly photogenic.
- To capture Stone Street’s cobblestones and historic buildings in full, arrive early before businesses set up tables and tents.
- Bring a zoom lens if you want detailed close-ups of the Statue of Liberty from the Staten Island Ferry.
Day 2
Area: Midtown/ East Village/ Soho
Sites covered:
- Flatiron Building
- Washington Square Park
- East Village shops and bars – around Bowery and 2nd Ave
- Soho streets
- New York Public Library
- Empire State Building
- Grand Central Terminal
- Times Square at night
Tips
- Download this self-guided city audio walking tour to explore at your own pace and save money.
- Washington Square Park is a beautiful spot—we enjoyed it so much, we returned later in our trip. The park buzzes with people relaxing, street musicians, and a charming atmosphere, though it can get crowded around midday. This Washington Square Park food walking tour offers a fantastic alternative.
- Take your time exploring East Village—it’s a vibrant and fascinating neighborhood. For exceptional soba and authentic Japanese cuisine, be sure to visit Cocoron. With several locations, their soba noodles are truly outstanding.
- Discover more about East Village on this walking tour.
We met friends in East Village. Then we headed to explore Soho. Unfortunately, I didn’t take as many photos as I would have liked. Like East Village, Soho is vibrant and full of character—I highly recommend visiting for its unique shops and independent vendors. - We visited the Empire State Building using our City Pass. We must have picked a perfect time because there were no lines. We went straight up, and large crowds appeared about 20 minutes later. It seemed to be the late afternoon lull, just before sunset—around 6 pm in mid-May.
- Be sure to check the library’s opening hours before you go. We arrived too late to go inside. The library is open until 5:45 pm most days, with extended hours on Tuesdays and Wednesdays until 7:45 pm. It usually opens at 10 am, except Sundays when it opens at 1 pm. You can find the schedule on their website.
- Times Square at night is extremely busy. If you don’t enjoy crowds, I wouldn’t recommend visiting after dark. Instead, try going during the day or early dusk when it’s a bit quieter. There are many fantastic alternative nighttime activities to enjoy in New York City.
If you prefer walking tours to explore new areas, check out these options:
- East Village walking tour
- Soho, Little Italy and Chinatown walking tour
- Midtown self-guided walking tour
- Self guided tour of Grand Central station.
- Or buy skip the line Empire State Building tickets here.
Photo tips and locations
- At the Flatiron, Worth Square provides a spacious pedestrian area. It is perfect for capturing shots with the iconic Flatiron Building as a backdrop. Nearby, several crosswalks provide excellent opportunities for dynamic street photography. Don’t miss the famous clock located at the corner of W 24th Street and 5th Avenue.
- Washington Square Park has a vibrant atmosphere but tends to be very crowded, especially during events like graduation photography sessions. For a quieter experience and better shots, try visiting early in the morning.
- A friendly security guard at the Empire State Building gave a helpful tip. He recommended the east corner of the observation deck. This spot is the best to photograph the Chrysler Building’s top with the city skyline behind it.
- The balcony at Grand Central Station provides an ideal vantage point. It is perfect for setting up a time-lapse of the bustling main hall below.
- To escape the crowds yet still capture stunning nighttime views of Times Square, head to the Novotel Times Square. Their rooftop bar provides a fantastic spot to enjoy drinks while overlooking the vibrant square.
Book a tour of Times Square at night here.
Day 3
Area: Brooklyn/ Chinatown/ Little Italy
Sites covered:
- Brooklyn Heights
- Brooklyn Heights Promenade
- Brooklyn Bridge Park
- Dumbo
- Greenwood Cemetery
- Chinatown
- Doyers Street (Chinatown)
- Little Italy
Tips
We left it too late to walk the Brooklyn Bridge. It was very hot and crowded. Instead, we took the A or C line (blue line) to High Street–Brooklyn. Then, we strolled along the Promenade to the waterfront. It’s a beautiful walk with stunning views of Manhattan and plenty of friendly dogs!
Brooklyn Bridge Park quickly became one of my favorite spots, offering lush greenery, a relaxed vibe, and breathtaking views.
Greenwood Cemetery might seem an unusual choice, but it’s a vast cemetery set within a stunning arboretum. Admission is free, with maps available to guide visitors around and information about notable people buried there. They also host events throughout the year. You can find more details here.
I recommend dedicating at least a full day to explore this part of Brooklyn. During our visit, a huge street festival closed off 10 blocks, featuring live music, food stalls, and vibrant energy. It was such a fun, lively area to relax in the parks or explore local shops.
For a great bagel, we loved Shelsky’s Brooklyn Bagels.
To travel from Brooklyn to Chinatown, take the F line (orange) to East Broadway.
We’re big fans of Asian cuisine. We spent plenty of time wandering through Chinatown. We took photos, sampled food, and browsed shops and street vendors. If you continue walking uptown, you’ll pass through Little Italy as well.

Photo tips and locations
Visit Brooklyn Bridge Park and make your way to the spot marked Old Pier 1 on Google Maps. This offers my favorite view of Manhattan. It is perfect for capturing striking shots. A zoom lens enhances these shots with its compression effect.
Chinatown is vibrant and full of life, ideal for capturing the hustle and bustle. Doyers Street during golden hour provides beautiful, warm light that enhances the atmosphere.
Brooklyn, Chinatown, and Little Italy are excellent locations for portrait and human interest photography, offering rich scenes and authentic moments.
Day 4
Area: Dumbo/ Chinatown/ Upper West Side/ Manhattanville
Sites covered:
- Dumbo view of Manhattan Bridge
- Museum at Eldridge Street
- American Museum of Natural History
- Upper West Side bookshops, cafes, stores
- Columbia University
Tips
- It was a bit of a mixed day. We made sure to arrive early in DUMBO, mainly to capture photos of the iconic Washington Street. We also wanted to walk back to Manhattan via the Brooklyn Bridge. We reached DUMBO (accessible via the blue line on the metro) around 9:30 a.m., which was just the right time—quiet and almost crowd-free, perfect for photos.
- If you plan to walk the Brooklyn Bridge, go early. I highly recommend this to beat the crowds. It was already getting busy by 10 a.m. If you’re visiting in summer, start early. Temperatures can soar close to 30°C (86°F). There’s no shade or shelter along the mile-long walk. Conversely, the bridge is very windy in winter, so dress warmly if you visit then.
- One hidden gem worth visiting is the Museum at Eldridge Street, a beautifully restored synagogue located in Chinatown. The restoration work is incredible, with ornate decorations and a striking vivid blue stained-glass window. We chose to visit today because Mondays offer “pay what you like” entry. Regular tickets cost $14 on other days. Note that the museum is closed on Saturdays and during major Jewish and national holidays.
- Our City Pass included admission to the American Museum of Natural History. It also included a planetarium show—the Blue Planet or Dark Universe. We saw the Dark Universe narrated by Neil deGrasse Tyson, and it was fantastic. Shows run every half hour, with the last at 4 p.m., so be sure to reserve your time slot when you enter to avoid missing out.
- The Natural History Museum is open daily from 10 a.m. to 5:45 p.m.
- After a few hours at the museum, take some time to explore the Upper West Side’s shops and cafes. It’s a lovely way to unwind.
- For book lovers, don’t miss Westsider Rare and Used Books.
- If you don’t have the City Pass, you can book your American Museum of Natural History admission here.
Photo tips and Locations
- The iconic view of the Manhattan Bridge can be found on Washington Street at the corner of Water Street. Search for “Dumbo Manhattan Bridge – Photography Location” on Google Maps. Arrive early, as crowds begin to form after 11 a.m.
- Morning is also an ideal time to walk across the Brooklyn Bridge, when the light is softer and less harsh.
- The Museum at Eldridge Street is a stunning subject for photography. Be prepared to use low-light camera settings. This will help capture the vibrant blue glass window illuminated against the dim interior.
- The Upper West Side is perfect for street photography, featuring charming cobblestone streets, quaint shops, and classic red brick buildings.
- We visited Columbia University to see a friend. I highly recommend it. You will enjoy photographing unique and interesting architecture.
Day 5
Area: Midtown/ Statue of Liberty/ Chelsea
Sites covered:
- Top of the Rock – Rockefeller Center viewing platform
- The Statue of Liberty
- Ellis Island
- Hudson Yards
- The High Line
Tips
- You do need to book Top of the Rock in advance. Sometimes this just means arriving at 10am to buy the next available slot, often around 1pm. During the low season, you might be able to buy a ticket on arrival. However, if you’re on a tight schedule, you should book your time slot ahead. If you’re short on time, book in advance. If you want a sunset visit, it’s best to reserve early. This will help you avoid missing out. Top of the Rock is included in the City Pass. You can reserve your visit through the City Pass website.
- If you’re not using the City Pass, you can book Top of the Rock admission here.
- The Statue of Liberty and Ellis Island were included in our City Pass. They turned out to be one of the most unexpectedly enjoyable experiences. Tickets cover the ferry to the Statue of Liberty. They also cover the ferry onwards to Ellis Island and the return ferry to Manhattan. The tickets include entry to the Ellis Island museum. If you want to climb to the crown of the Statue, you must book this separately and well in advance. The information center at the Statue is fascinating, and the Ellis Island museum is incredible—history enthusiasts will love it. Even if museums aren’t your thing, this one is engaging, recent, and accessible, so most visitors find it worthwhile. Plus, the boat rides are a lot of fun.
- If you don’t plan on using the City Pass, book a combined ticket. You can book it here for the Statue of Liberty, Ellis Island, and ferry.
- Bring snacks, as food on the boats and islands is quite expensive!
- Hudson Yards is a very new attraction, with the ‘Vessel’ opening this year. You can climb it for free, but you must book tickets online in advance here. Tickets become available two weeks ahead of time, so watch for your preferred time slot. A limited number of same-day tickets are released, but these can be hard to get.
- I highly recommend the High Line—it was probably my favorite spot in New York. This 1.5-mile elevated public park runs along a former railway track and offers a peaceful oasis above the city streets. There are plenty of places to pause, rest, enjoy the views, and even grab a drink. Read more here.
- The High Line entrance is located at the corner of Hudson Yards. This location makes it easy to visit both in one trip.
Looking for tour options at The High Line or Hudson Yards?
Why not combine Hudson Yards with admission to one of New York’s newest observation decks?
Photo Locations and tips
To capture the iconic Top of the Rock shot from the viewing platform, book the 8am time slot. This early hour is the quietest, with very few people around.
Hudson Yards offers fantastic photo opportunities both outside and inside the honeycomb structure. For the best light, visit early in the morning. This timing avoids harsh reflections from the surrounding glass buildings. It also minimizes shadows.
The High Line is packed with great aerial street photography spots. My favorites are where the park crosses 10th Avenue. You can’t miss it. There is a large seating area with glass windows (see photo below). Other stunning views include those overlooking 20th and 14th Streets.
Day 6
Area: Central Park/ Upper East Side/ Tribeca
Sites covered:
- Central Park
- Central Park – Bethesda Terrace and Fountain
- Central Park – Bow Bridge and Lake
- The Metropolitan Museum of Art (The Met)
- The Met Rooftop Bar
- Albertine Books (Upper East Side)
- FDNY Ladder 8 (the fire station from Ghostbusters)
- Staple Street Sky Bridge
- Hudson River Park – Pier 25 and Pier 34
Tips
- Ideally, we would have spent more than just a couple of hours exploring Central Park – it’s enormous. We visited iconic spots like the Terrace, Fountain, and Bow Bridge. These are scenes you often see in movies. There’s so much more to discover. You can explore other lakes or visit a castle. You can even row a boat on the lake for $15.
- Stroll through Central Park to reach The Met.
- The Metropolitan Museum of Art is massive. I’ve never experienced anything like it. We chose 4 or 5 key exhibits to focus on, knowing we couldn’t possibly see everything in one visit. The great thing is your ticket is valid for three consecutive days. You can return and explore more at your own pace. It’s simply impossible to take it all in at once! Our City Pass included the Met ticket. This ticket also covers entry to the Met 5th Ave. It includes entry to Met Breuer. It also includes entry to Met Cloisters locations.
- The Met rooftop bar is free to visit – you don’t even need to purchase a drink. Just head up and enjoy stunning views over Central Park and the city skyline.
- We traveled across the city from the east to the west side. We took the Q line (yellow) and then the 1 line (red) to visit FDNY Ladder 8. It’s still an active fire station. The Ghostbusters logo is displayed on the floor outside!
- On our last evening, we wanted to watch the sunset from one of the piers on the west side. Take a walk along the river. It feels like a vibrant community space. The area is filled with joggers, dogs, dog parks, and people enjoying picnics outdoors.
- My favorite sunset spot in Manhattan is Pier 34.
- For dinner afterward, I highly recommend Black Tap Craft Burgers & Beer. They serve incredible burgers. They have the biggest crazy shakes I’ve ever seen. They offer the cheapest craft beers we found all week. At just $8, this is a great deal for New York.
Photo tips and locations
- To capture Bethesda Terrace without crowds, plan to visit very early in the morning.
- Albertine Books, part of the French Embassy Cultural Program, requires a security check before entry. Don’t miss the blue ceiling painting located upstairs in the children’s book section.
- The Staple Street Sky Bridge in Tribeca was surprisingly peaceful at 5 PM, despite its popularity on Instagram. The puddles on the streets below create excellent photo opportunities.
- For a stunning sunset view of Manhattan, head to Pier 34. Walk to the end of the pier for a variety of breathtaking perspectives.
And there you have it. This is our 6 day itinerary. We did this exactly as first-timers to New York City. Don’t forget you can download the spreadsheet here to keep a copy on your phone when you travel.
If you use this itinerary, please let me know!
If you’re in a rush, save it for later to plan your future trip!
Related Article: Most Beautiful Places in Japan | Top 10 Places to Visit in Japan 2025
Looking to travel like me? Here are my top resources for planning trips:
🌍 My Top Travel Resources
These are the tools and platforms I personally use to plan my trips. They save me time, money, and make travel stress-free.
✈️ Flights
I always check these platforms first to get the best deals on flights worldwide.
✈️ Find Flights on Aviasales 💸 Book Cheap Flights🚗 Car Rentals
For reliable rentals and last-minute deals, these are my top choices.
🚗 Compare Car Rentals 🚙 Book Car Rental on Discovercars🏨 Accommodation
From hotels to unique local stays, I rely on these platforms for flexibility and great deals.
🏨 Search Hotels 🏡 Find Stays on Trip.com 🛏️ Book Hostels🎟️ Tours & Activities
Book day trips and local experiences with ease on this trusted platform.
🎟️ Discover Tours🛡️ Travel Insurance
I never travel without insurance. This provider covers everything I need—even adventure sports.
🛡️ Get Travel Insurance